Build OAuth2 application using ORY SSO with Hydra and Kratos
This blog will describe how to build a self service oauth2 application using ORY framework
AUTHORIZATION
savz
4/26/202420 min read
ORY SSO
Ory is the world's largest open-source community for cloud software application security.
It provides a convenient and simple way to implement OAuth 2.0 / OAuth 2.1, OpenID Connect solution for your custom application.
Ory includes Hydra and Kratos components to manage the authentication and authorization solutions for any application. Hydra is an OAuth 2.0 and OpenID Connect provider and Kratos is an identity management server. They can be used separately or together depending on your specific needs for authentication and user management.
ORY Hydra and Kratos are two powerful tools that can be combined to create a robust authentication solution. ORY Hydra is an open-source OAuth2 and OpenID Connect server that provides secure and scalable access control for your applications. It allows you to delegate authentication and authorization tasks to a central server, ensuring that your users' credentials are protected. On the other hand, ORY Kratos is a user management system that handles user registration, login, and account management functionalities. By integrating both Hydra and Kratos, you can build a comprehensive authentication solution that not only ensures the security of your users' data but also provides a seamless experience for them. With ORY Hydra and Kratos, you can simplify the authentication process and focus on delivering a secure and user-friendly application.
What is OAuth2.0 and OIDC
OAuth2 and OpenID Connect are widely used protocols in modern web applications for authentication and authorization. OAuth2 is an authorization framework that allows users to grant access to their protected resources to other applications without sharing their credentials. It provides a secure and standardized way for applications to obtain limited access to user data. On the other hand, OpenID Connect is an authentication layer built on top of OAuth2. It enables users to log in to multiple applications using a single set of credentials, eliminating the need for separate usernames and passwords. OpenID Connect also provides additional user information, making it easier for applications to personalize user experiences. These protocols have become fundamental in ensuring secure and seamless user interactions on the web.
OAuth2 Components
OAuth 2.0 is an authorization framework that enables third-party applications to obtain limited access to a web service. The OAuth 2.0 framework defines several components that work together to enable secure access to protected resources. Here are the main components of OAuth 2.0:
Resource Owner: The resource owner is typically the user who owns the data or resources that are being protected. For example, a user who owns an account on a website.
Client: The client is the application that wants to access the user's resources. This could be a web application, a mobile app, or another type of software.
Authorization Server: The authorization server is responsible for authenticating the resource owner and obtaining their consent to grant access to the client. It issues access tokens to the client after successfully authenticating the resource owner and obtaining authorization.
Resource Server: The resource server hosts the protected resources that the client wants to access. It is responsible for handling requests from clients and validating access tokens.
Authorization Grant: The authorization grant is a credential representing the resource owner's authorization, used by the client to obtain an access token. There are several types of authorization grants defined in OAuth 2.0, such as authorization code, implicit, resource owner password credentials, and client credentials.
Access Token: The access token is a credential that the client presents to the resource server to access protected resources on behalf of the resource owner. It represents the authorization granted to the client by the resource owner.
Token Endpoint: The token endpoint is a server endpoint that the client can use to exchange an authorization grant for an access token. It is part of the authorization server.
Redirection URI: When the client initiates the authorization process, it typically redirects the resource owner to the authorization server's authorization endpoint. After the resource owner grants authorization, they are redirected back to the client application using a redirection URI specified by the client.
These components work together to facilitate secure authorization and access control in distributed systems. By delegating authorization to a centralized authorization server, OAuth 2.0 enables applications to access resources on behalf of users without needing to handle their credentials directly.
Let's illustrate these components with a concrete example of how OAuth 2.0 might be used in the context of a social media application (let's call it "SocialApp") that allows users to sign in using their Google account.
Resource Owner: Alice is a user of SocialApp. She owns her profile, posts, and other data within the SocialApp platform.
Client: SocialApp is the client in this scenario. It's the application that Alice wants to sign in to using her Google account.
Authorization Server: Google's authorization server is responsible for authenticating Alice and obtaining her consent to grant access to SocialApp. It issues access tokens to SocialApp after successfully authenticating Alice and obtaining authorization.
Resource Server: SocialApp's servers host Alice's profile, posts, and other data. They are responsible for handling requests from clients (like web browsers or mobile apps) and validating access tokens issued by Google's authorization server.
Authorization Grant: In this scenario, SocialApp uses the "authorization code" grant type. When Alice tries to sign in to SocialApp using her Google account, SocialApp redirects her to Google's authorization server's login page. Once Alice logs in and grants permission to SocialApp, Google's authorization server redirects her back to SocialApp's servers with an authorization code.
Access Token: SocialApp exchanges the authorization code it received from Google for an access token. This access token represents the authorization granted to SocialApp by Alice.
Token Endpoint: Google's token endpoint is where SocialApp sends the authorization code to exchange it for an access token.
Redirection URI: SocialApp specifies a redirection URI that Google's authorization server should use to redirect Alice back to SocialApp's servers after she grants permission. This URI ensures that Alice is returned to the correct page within the SocialApp interface.
By using OAuth 2.0 in this way, SocialApp can allow users like Alice to sign in using their existing Google accounts without needing to handle their Google credentials directly. This enhances security and user convenience while delegating the responsibility of authentication and authorization to Google's authorization server.
ORY Hydra manages the OAuath2 authentication based on client management. It facilitates client creation along with scopes and redirect uris, based on which it manages the authorization when clients call oauth2 requests.
ORY Kratos manages the identities system. It facilitates identity creation and storing identity related configuration, and helps in validating identity authentication.
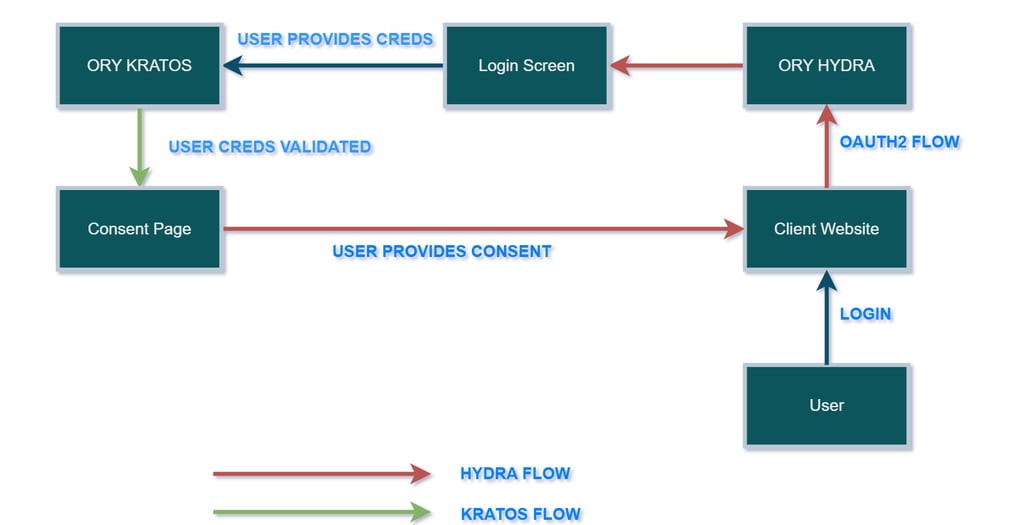
Workflow of Ory
Let's dive into a example
We will create a NextJS application to build the web application to create and sign in users, and integrate ORY Hydra to manage clients and Kratos to manage users
Lets start by creating a NextJS application - my-oauth2-app .Use the below command and choose the defaults to set up the new project
npx create-next-app@latest my-oauth2-app
Once the project is setup, lets dive into how to integrate Ory Hydra and Kratos into our project.
Ory provides docker images for both Hydra and Kratos and we will leverage the same to use in our project. Lets build up a docker-compose file to start Hydra and Kratos docker services.
version: '3.7'
services:
hydra-migrate:
image: oryd/hydra:v2.2.0
restart: on-failure
networks:
- ory-network
command:
migrate sql -e --yes -c /etc/config/hydra.yml
environment:
- DSN=postgres://postgres:postgres@hydra-db:5432/hydra?sslmode=disable&max_conns=20&max_idle_conns=4
volumes:
- type: bind
source: ./config
target: /etc/config
depends_on:
- hydra-db
hydra:
image: oryd/hydra:v2.2.0
restart: on-failure
networks:
- ory-network
ports:
- "4444:4444" # Public port
- "4445:4445" # Admin port
command:
serve all -c /etc/config/hydra.yml --dev
volumes:
- type: bind
source: ./config
target: /etc/config
environment:
- SECRETS_SYSTEM=my-oauth2-secret
- URLS_LOGIN=http://127.0.0.1:3000/login # Sets the login endpoint of the User Login & Consent flow.
- URLS_CONSENT=http://127.0.0.1:3000/consent # Sets the consent endpoint of the User Login & Consent flow.
# set to Hydra public domain
- URLS_SELF_PUBLIC=http://127.0.0.1:4444 # to public endpoint
- URLS_SELF_ISSUER=http://127.0.0.1:4444 # to public endpoint
- DSN=postgres://postgres:postgres@hydra-db:5432/hydra?sslmode=disable&max_conns=20&max_idle_conns=4
- SERVE_PUBLIC_PORT=4444
- SERVE_PUBLIC_HOST=0.0.0.0
- SERVE_PUBLIC_CORS_ENABLED=true
- SERVE_ADMIN_PORT=4445
depends_on:
- hydra-migrate
kratos-migrate:
image: oryd/kratos:v1.1.0
environment:
- DSN=postgres://postgres:postgres@kratos-db:5432/kratos?sslmode=disable&max_conns=20&max_idle_conns=4
volumes:
- type: bind
source: ./config
target: /etc/config
command: -c /etc/config/kratos.yml migrate sql -e --yes
restart: on-failure
networks:
- ory-network
kratos:
depends_on:
- kratos-migrate
image: oryd/kratos:v1.1.0
ports:
- '4433:4433' # public
- '4434:4434' # admin
restart: unless-stopped
environment:
- LOG_LEVEL=trace
- DSN=postgres://postgres:postgres@kratos-db:5432/kratos?sslmode=disable&max_conns=20&max_idle_conns=4
command: serve -c /etc/config/kratos.yml --dev
volumes:
- type: bind
source: ./config
target: /etc/config
networks:
- ory-network
hydra-db:
image: postgres:12.18
ports:
- 5433:5432
environment:
- POSTGRES_USER=postgres
- POSTGRES_PASSWORD=postgres
- POSTGRES_DB=hydra
networks:
- ory-network
kratos-db:
image: postgres:12.18
ports:
- 5432:5432
environment:
- POSTGRES_USER=postgres
- POSTGRES_PASSWORD=postgres
- POSTGRES_DB=kratos
networks:
- ory-network
networks:
ory-network:
name: ory-net
Let's understand few of the services first from the above file
hydra - This is the official Hydra image hosted by Ory, it needs hydra.yml config to run the service
kratos - This is the offical Kratos image hosted by Kratos, it needs kratos.yml config to run the service
hydra-db - This is a postgres db server to be used by Hydra for managing client data
kratos-db - This is a postgres db server to be used by Kratos for managing user data
hydra-migrate - This is a service that will create all the hydra related tables in hydra db by using hydra.yml
kratos-migrate - This is a service that will create all the kratos related tables in kratos db by using kratos.yml
Please note hydra-migrate and kratos-migrate needs to run along with the rest of the services, before we can start with the application, else all the calls to hydra and kratos will fail if corresponding tables are not available.
Lets add the kratos and hydra files in config folder of the project
docker-compose.yml
log:
leak_sensitive_values: true
version: v0.13.0
dsn: memory
serve:
public:
base_url: http://127.0.0.1:4433/
cors:
enabled: true
admin:
base_url: http://kratos:4434/
selfservice:
default_browser_return_url: http://127.0.0.1:3000/
allowed_return_urls:
methods:
password:
enabled: true
flows:
error:
ui_url: http://127.0.0.1:3000/error
settings:
ui_url: http://127.0.0.1:3000/settings
privileged_session_max_age: 15m
required_aal: highest_available
logout:
after:
default_browser_return_url: http://127.0.0.1:3000/login
login:
ui_url: http://127.0.0.1:3000/login
lifespan: 10m
registration:
lifespan: 10m
ui_url: http://127.0.0.1:3000/registration
after:
password:
hooks:
- hook: session
- hook: show_verification_ui
log:
level: debug
format: text
leak_sensitive_values: true
secrets:
cookie:
- PLEASE-CHANGE-ME-I-AM-VERY-INSECURE
cipher:
- 32-LONG-SECRET-NOT-SECURE-AT-ALL
ciphers:
algorithm: xchacha20-poly1305
hashers:
algorithm: bcrypt
bcrypt:
cost: 8
identity:
default_schema_id: default
schemas:
- id: default
url: file:///etc/config/identity.schema.json
courier:
smtp:
connection_uri: smtps://test:test@mailslurper:1025/?skip_ssl_verify=true
oauth2_provider:
url: http://hydra:4445
Please refer https://www.ory.sh/docs for all the explantions on kratos and hydra configurations
SInce now you are aware that kratos manages user identities, it needs to maintain a schema of user attributes that it needs to store in the kratos tables. For that, we maintain a file called identity.schema.json (can be any custom name), as you see in the kratos.yml provided above
config/hydra.yml
config/kratos.yml
config/identity.schema.json
{
"$id": "https://schemas.ory.sh/presets/kratos/quickstart/email-password/identity.schema.json",
"$schema": "http://json-schema.org/draft-07/schema#",
"title": "Person",
"type": "object",
"properties": {
"traits": {
"type": "object",
"properties": {
"email": {
"type": "string",
"format": "email",
"title": "E-Mail",
"minLength": 3,
"ory.sh/kratos": {
"credentials": {
"password": {
"identifier": true
}
}
}
},
"first_name": {
"type": "string",
"title": "First name",
"minLength": 1
},
"last_name": {
"type": "string",
"title": "Last name",
"minLength": 1
}
},
"required": [
"first_name",
"email"
],
"additionalProperties": false
}
}
}
As you can see, kratos maintains traits attributes for storing user related info. We have added few attributes like email, first_name and last_name that will be stored in kratos table, and only the first_name and email are required atttributes. Kratos will throw validation errors if any of these 2 attributes are not present, and also ignore if any other attributes are provided which are not present in the schema. You can add any custom attributes based on need
This is all we need to setup the kratos and hydra for our application. You can run docker compose -f ./docker-compose up --build to start all the services.
Lets setup the application
We wil create 2 flows - LOGIN where a user can perform a normal login to the application or an oauth2 login to the application, and REGISTRATION where a user can register after providing their details. We will also add a consent flow in order to integrate as part of the oauth2 login flow. We will maintain the below hierarchy of the project -
app
│ favicon.ico
│ globals.css
│ layout.tsx
│ login-root.tsx
│ page.tsx
│
├───api
│ ├───consent
│ │ route.ts
│ │
│ ├───login
│ │ route.ts
│ │
│ └───registration
│ route.ts
│
├───consent
│ consent.tsx
│ page.tsx
│
├───lib
│ ory.ts
│ util.ts
│
├───login
│ login.tsx
│ page.tsx
│
├───partner
│ page.tsx
│
└───registration
page.tsx
registration.tsx
First, lets add a npm library for ory client to invoke Hydra and Kratos calls
npm install @ory/client
Lets start adding the files now
page.tsx
import { redirect } from "next/navigation";
import { LoginRoot } from "./login-root";
export default async function Home() {
return (
<section className="bg-gray-50 dark:bg-gray-900">
<div className="flex flex-col items-center justify-center px-6 py-8 mx-auto md:h-screen lg:py-0">
<div className="w-full bg-white rounded-lg shadow dark:border md:mt-0 sm:max-w-md xl:p-0 dark:bg-gray-800 dark:border-gray-700">
<div className="p-6 space-y-4 md:space-y-6 sm:p-8">
<h1 className="text-xl font-bold leading-tight tracking-tight text-gray-900 md:text-2xl dark:text-white">
Sign in to your account
</h1>
</div>
<LoginRoot></LoginRoot>
</div>
</div>
</section>
)
}
login-root.tsx
'use client'
import { redirect } from "next/navigation"
import ory from "./util/ory"
export const LoginRoot = () => {
const login = () => {
window.location.assign('http://localhost:3000/login')
}
const loginOauth2 = () => {
window.location.assign(`${ory.hydraPublicUrl}/oauth2/auth?client_id=xxxxxx-xxxx&scope=offline+user_create+user_read+user_edit+user_delete&redirect_uri=http://localhost:3000/partner&response_type=code&state=kahsfkhas12fsf`)
}
return (
<div>
<button onClick={login} className="w-full text-white bg-blue-700 hover:bg-blue-800 focus:ring-4 focus:ring-blue-300 font-medium rounded-lg text-sm px-5 py-2.5 me-2 mb-2 dark:bg-blue-600 dark:hover:bg-blue-700 focus:outline-none dark:focus:ring-blue-800">Login</button>
<button onClick={loginOauth2} className="w-full text-white bg-blue-700 hover:bg-blue-800 focus:ring-4 focus:ring-blue-300 font-medium rounded-lg text-sm px-5 py-2.5 me-2 mb-2 dark:bg-blue-600 dark:hover:bg-blue-700 focus:outline-none dark:focus:ring-blue-800">Login with Oauth2</button>
</div>
)
}
You can build your own custom login, registration and consent pages based on the below sample code
import { redirect } from "next/navigation";
import { LoginProcess } from "./login";
import ory from "../util/ory";
import { headers } from "next/headers"
export default async function Login({searchParams}: {
searchParams: {
login_challenge: string;
flow: string
}
}){
let initUrl = `${ory.basePath}/self-service/login/browser?aa1&refresh&return_to=`
if (searchParams.login_challenge){
initUrl += `&login_challenge=${searchParams.login_challenge}`
}
if(!searchParams.flow){
redirect(initUrl)
}
try{
const { data : loginFlow } = await ory.fe.getLoginFlow({
id: searchParams.flow,
cookie: headers().get('cookie') as string | undefined
})
return (
<section className="bg-gray-50 dark:bg-gray-900">
<div className="flex flex-col items-center justify-center px-6 py-8 mx-auto md:h-screen lg:py-0">
<a href="#" className="flex items-center mb-6 text-2xl font-semibold text-gray-900 dark:text-white">
Application
</a>
<div className="w-full bg-white rounded-lg shadow dark:border md:mt-0 sm:max-w-md xl:p-0 dark:bg-gray-800 dark:border-gray-700">
<div className="p-6 space-y-4 md:space-y-6 sm:p-8">
<h1 className="text-xl font-bold leading-tight tracking-tight text-gray-900 md:text-2xl dark:text-white">
Sign in to your account
</h1>
<LoginProcess loginChallenge={searchParams.login_challenge} flow={searchParams.flow} loginFlow={loginFlow}/>
</div>
</div>
</div>
</section>
)
} catch (err){
console.error(err)
}
}
'use client'
import { LoginFlow, UiNodeInputAttributes } from "@ory/client";
import { useRouter } from "next/navigation";
import { useState } from "react";
export const LoginProcess = ({ loginChallenge, flow, loginFlow }: { loginChallenge: string, flow: string, loginFlow: LoginFlow }) => {
const [message, setMessage] = useState('')
const [id, setId] = useState('')
const router = useRouter()
const doLogin = async (event: React.FormEvent<HTMLFormElement>) => {
event.preventDefault();
const data = new FormData(event.target as HTMLFormElement)
data.append('flow', flow)
const resp = await fetch('/api/login', {
method: 'POST',
body: data
})
const res = await resp.json();
if (res.message) {
setMessage(res.message)
if (res.id) {
setId(res.id)
}
} else if (res.redirect_browser_to) {
window.location.assign(res.redirect_browser_to)
} else router.refresh()
}
if (id) {
return (<section className="bg-gray-50 dark:bg-gray-900"><div className="space-y-4 md:space-y-6">{message}</div><div className="space-y-4 md:space-y-6">Your id is {id} </div></section>
)
}
const hiddenNodes = loginFlow.ui.nodes.filter(node => node.type == 'input' && (node.attributes as UiNodeInputAttributes).type === 'hidden')
return (
<form className="space-y-4 md:space-y-6" onSubmit={doLogin}>
<input type="hidden" name="login_challenge" value={loginChallenge}></input>
{hiddenNodes.map(node => (<input key={(node.attributes as UiNodeInputAttributes).name} type="hidden" name={(node.attributes as UiNodeInputAttributes).name} value={(node.attributes as UiNodeInputAttributes).value} required readOnly />))}
<div>
<label htmlFor="email" className="block mb-2 text-sm font-medium text-gray-900 dark:text-white">Your email</label>
<input type="email" name="email" id="email" className="bg-gray-50 border border-gray-300 text-gray-900 sm:text-sm rounded-lg focus:ring-primary-600 focus:border-primary-600 block w-full p-2.5 dark:bg-gray-700 dark:border-gray-600 dark:placeholder-gray-400 dark:text-white dark:focus:ring-blue-500 dark:focus:border-blue-500" placeholder="name@company.com" required />
</div>
<div>
<label htmlFor="password" className="block mb-2 text-sm font-medium text-gray-900 dark:text-white">Password</label>
<input type="password" name="password" id="password" placeholder="••••••••" className="bg-gray-50 border border-gray-300 text-gray-900 sm:text-sm rounded-lg focus:ring-primary-600 focus:border-primary-600 block w-full p-2.5 dark:bg-gray-700 dark:border-gray-600 dark:placeholder-gray-400 dark:text-white dark:focus:ring-blue-500 dark:focus:border-blue-500" required />
</div>
<button type="submit" className="w-full text-white bg-blue-700 hover:bg-blue-800 focus:ring-4 focus:ring-blue-300 font-medium rounded-lg text-sm px-5 py-2.5 me-2 mb-2 dark:bg-blue-600 dark:hover:bg-blue-700 focus:outline-none dark:focus:ring-blue-800">Sign in</button>
<p className="text-sm font-light text-gray-500 dark:text-gray-400">
Don’t have an account yet? <a href={`/registration?flow=${flow}`} className="font-medium text-primary-600 hover:underline dark:text-primary-500">Sign up</a>
</p>
</form>
)
}
login/page.tsx
login/login.tsx
api/login/route.ts
import ory from "@/app/util/ory";
import { headers } from "next/headers"
import { AxiosError, isAxiosError } from "axios";
import { NextRequest, NextResponse } from "next/server";
export async function POST(request:NextRequest){
let bodyData: FormData
try {
bodyData = await request.formData();
} catch(err){
throw new Error()
}
const username = bodyData.get('email') as string
const password = bodyData.get('password') as string
const flow = bodyData.get('flow') as string
try {
const flowData = await ory.fe.getLoginFlow({
id: flow,
cookie: headers().get('cookie') as string | undefined
})
const loginData = await ory.fe.updateLoginFlow({
flow, updateLoginFlowBody: {
method: 'password',
identifier: username,
password,csrf_token: bodyData.get('csrf_token') as string
},
cookie: getBrowserCookies()
},{
validateStatus: () => true,
maxRedirects: 0
})
if ('redirect_browser_to' in loginData.data){
return NextResponse.json({redirect_browser_to: loginData.data.redirect_browser_to})
} else
return NextResponse.json({ message: 'Logged in Succesfully', id: loginData.data.session.id})
} catch (err){
if (isAxiosError(err)){
const r = (err as AxiosError).stack
return NextResponse.json({ message: 'Failure'})
}
}
}
registration/page.tsx
import { RegistrationFlow } from "./registration";
export default async function Login({searchParams}: {
searchParams: {
flow: string;
}
}){
return (
<section className="bg-gray-50 dark:bg-gray-900">
<div className="flex flex-col items-center justify-center px-6 py-8 mx-auto md:h-screen lg:py-0">
<a href="#" className="flex items-center mb-6 text-2xl font-semibold text-gray-900 dark:text-white">
<img className="w-8 h-8 mr-2" src="https://flowbite.s3.amazonaws.com/blocks/marketing-ui/logo.svg" alt="logo"/>
DTech-Journal
</a>
<div className="w-full bg-white rounded-lg shadow dark:border md:mt-0 sm:max-w-md xl:p-0 dark:bg-gray-800 dark:border-gray-700">
<div className="p-6 space-y-4 md:space-y-6 sm:p-8">
<h1 className="text-xl font-bold leading-tight tracking-tight text-gray-900 md:text-2xl dark:text-white">
Registration
</h1>
<RegistrationFlow flow={searchParams.flow}/>
</div>
</div>
</div>
</section>
)
}
registration/registration.tsx
'use client'
import { useRouter } from "next/navigation";
import { useState } from "react";
export const RegistrationFlow = ({ flow }: { flow: string }) => {
const [message, setMessage] = useState('')
const [id, setId] = useState('')
const doRegistration = async (event: React.FormEvent<HTMLFormElement>) => {
event.preventDefault();
const data = new FormData(event.target as HTMLFormElement)
data.append('flow', flow)
const resp = await fetch('/api/registration', {
method: 'POST',
body: data
})
const res = await resp.json();
if (res.message) {
setMessage(res.message)
if (res.id) {
setId(res.id)
}
} else if (res.redirect_browser_to) {
window.location.assign(res.redirect_browser_to)
} else useRouter().refresh()
}
const backToLogin = () => {
window.location.assign(`/login?flow=${flow}`)
}
if (id) {
return (<section className="bg-gray-50 dark:bg-gray-900"><div className="space-y-4 md:space-y-6">{message}</div><div className="space-y-4 md:space-y-6">Your id is {id} </div>
<div><button onClick={backToLogin} className="w-full text-white bg-blue-700 hover:bg-blue-800 focus:ring-4 focus:ring-blue-300 font-medium rounded-lg text-sm px-5 py-2.5 me-2 mb-2 dark:bg-blue-600 dark:hover:bg-blue-700 focus:outline-none dark:focus:ring-blue-800">Back</button></div></section>
)
}
return (
<form className="space-y-4 md:space-y-6" onSubmit={doRegistration}>
{message ? <div> {message} </div> : <></>}
<div>
<label htmlFor="first_name" className="block mb-2 text-sm font-medium text-gray-900 dark:text-white">Your First Name</label>
<input type="first_name" name="first_name" id="emfirst_nameail" className="bg-gray-50 border border-gray-300 text-gray-900 sm:text-sm rounded-lg focus:ring-primary-600 focus:border-primary-600 block w-full p-2.5 dark:bg-gray-700 dark:border-gray-600 dark:placeholder-gray-400 dark:text-white dark:focus:ring-blue-500 dark:focus:border-blue-500" placeholder="name@company.com" required />
</div>
<div>
<label htmlFor="last_name" className="block mb-2 text-sm font-medium text-gray-900 dark:text-white">Your Last Name</label>
<input type="last_name" name="last_name" id="last_name" className="bg-gray-50 border border-gray-300 text-gray-900 sm:text-sm rounded-lg focus:ring-primary-600 focus:border-primary-600 block w-full p-2.5 dark:bg-gray-700 dark:border-gray-600 dark:placeholder-gray-400 dark:text-white dark:focus:ring-blue-500 dark:focus:border-blue-500" placeholder="name@company.com" />
</div>
<div>
<label htmlFor="email" className="block mb-2 text-sm font-medium text-gray-900 dark:text-white">Your email</label>
<input type="email" name="email" id="email" className="bg-gray-50 border border-gray-300 text-gray-900 sm:text-sm rounded-lg focus:ring-primary-600 focus:border-primary-600 block w-full p-2.5 dark:bg-gray-700 dark:border-gray-600 dark:placeholder-gray-400 dark:text-white dark:focus:ring-blue-500 dark:focus:border-blue-500" placeholder="name@company.com" required />
</div>
<div>
<label htmlFor="password" className="block mb-2 text-sm font-medium text-gray-900 dark:text-white">Password</label>
<input type="password" name="password" id="password" placeholder="••••••••" className="bg-gray-50 border border-gray-300 text-gray-900 sm:text-sm rounded-lg focus:ring-primary-600 focus:border-primary-600 block w-full p-2.5 dark:bg-gray-700 dark:border-gray-600 dark:placeholder-gray-400 dark:text-white dark:focus:ring-blue-500 dark:focus:border-blue-500" required />
</div>
<button type="submit" className="w-full text-white bg-blue-700 hover:bg-blue-800 focus:ring-4 focus:ring-blue-300 font-medium rounded-lg text-sm px-5 py-2.5 me-2 mb-2 dark:bg-blue-600 dark:hover:bg-blue-700 focus:outline-none dark:focus:ring-blue-800">Register</button>
<button onClick={backToLogin} className="w-full text-white bg-blue-700 hover:bg-blue-800 focus:ring-4 focus:ring-blue-300 font-medium rounded-lg text-sm px-5 py-2.5 me-2 mb-2 dark:bg-blue-600 dark:hover:bg-blue-700 focus:outline-none dark:focus:ring-blue-800">Back</button>
</form>
)
}
api/registration/route.ts
import ory from "@/app/util/ory";
import { CreateIdentityBodyStateEnum } from "@ory/client";
import { NextRequest, NextResponse } from "next/server";
export async function POST(request:NextRequest){
let bodyData: FormData
try {
bodyData = await request.formData();
const email = bodyData.get('email')
const password = bodyData.get('password') as string
const firstName = bodyData.get('first_name')
const lastName = bodyData.get('last_name')
const resp = await ory.id.createIdentity({
createIdentityBody: {
schema_id: 'default',
traits: {
email,
first_name: firstName,
last_name: lastName
},
credentials: {
password: {
config: {
password
}
}
},
state: CreateIdentityBodyStateEnum.Active
}
})
return NextResponse.json({
message: 'Created successfully',
id: resp.data.id
})
} catch(err){
throw new Error()
}
}
consent/page.tsx
import { redirect } from "next/navigation";
import ory from "../util/ory";
import { ConsentProcess } from "./consent";
export default async function Consent({searchParams}: {
searchParams: {
consent_challenge: string;
}
}){
const consentResp = await ory.oauth2.getOAuth2ConsentRequest({
consentChallenge: searchParams.consent_challenge
})
if (consentResp.data.skip){
const cr = await ory.oauth2.acceptOAuth2ConsentRequest({
consentChallenge: searchParams.consent_challenge,
acceptOAuth2ConsentRequest: {
grant_access_token_audience: consentResp.data.requested_access_token_audience,
grant_scope: consentResp.data.requested_scope
}
},{
validateStatus : () => true,
maxRedirects: 0
})
redirect(cr.data.redirect_to)
}
return (
<section className="bg-gray-50 dark:bg-gray-900">
<div className="flex flex-col items-center justify-center px-6 py-8 mx-auto md:h-screen lg:py-0">
<div className="w-full bg-white rounded-lg shadow dark:border md:mt-0 sm:max-w-md xl:p-0 dark:bg-gray-800 dark:border-gray-700">
<div className="p-6 space-y-4 md:space-y-6 sm:p-8">
<h1 className="text-xl font-bold leading-tight tracking-tight text-gray-900 md:text-2xl dark:text-white">
Do you want to allow access for the below privileges?
</h1>
<ConsentProcess consentChallenge = {searchParams.consent_challenge} scope={consentResp.data.requested_scope as string[]}/>
</div>
</div>
</div>
</section>
)
}
consent/consent.tsx
'use client'
import { useRouter } from "next/navigation";
export const ConsentProcess = ({consentChallenge, scope}:{consentChallenge: string, scope: string[]}) => {
const acceptConsent = async (event: React.FormEvent<HTMLFormElement>) => {
event.preventDefault();
const data = new FormData(event.target as HTMLFormElement)
data.append('consent_challenge', consentChallenge)
const resp = await fetch('/api/consent', {
method: 'POST',
body: data
})
const res = await resp.json();
if (res.redirect_browser_to) {
window.location.assign(res.redirect_browser_to)
} else useRouter().refresh()
};
return (
<form className="space-y-4 md:space-y-6" onSubmit={acceptConsent}>
<div>
{scope.map(val=><div><input type="checkbox" name={val}></input>{val}</div>)}
</div>
<button type="submit" className="w-full text-white bg-blue-700 hover:bg-blue-800 focus:ring-4 focus:ring-blue-300 font-medium rounded-lg text-sm px-5 py-2.5 me-2 mb-2 dark:bg-blue-600 dark:hover:bg-blue-700 focus:outline-none dark:focus:ring-blue-800">Allow</button>
</form>
)
}
api/consent/route.ts
import ory from "@/app/util/ory";
import { NextRequest, NextResponse } from "next/server";
export async function POST(request:NextRequest){
let bodyData: FormData
try {
bodyData = await request.formData();
} catch(err){
throw new Error()
}
const consentChallenge = bodyData.get('consent_challenge') as string
const consentResp = await ory.oauth2.getOAuth2ConsentRequest({
consentChallenge: consentChallenge
})
const userInfo = (await ory.id.getIdentity({
id: consentResp.data.subject as string
})).data
const scopes = consentResp.data.requested_scope;
const selectedScopes = scopes?.filter(x => !bodyData.get(x))
const cr = await ory.oauth2.acceptOAuth2ConsentRequest({
consentChallenge,
acceptOAuth2ConsentRequest: {
grant_access_token_audience: consentResp.data.requested_access_token_audience,
grant_scope: selectedScopes,
session: {
id_token: { first_name: userInfo.traits.first_name, last_nama: userInfo.traits.last_name, email: userInfo.traits.email}
}
},
},{
validateStatus : () => true,
maxRedirects: 0
})
if (cr.data.redirect_to){
return NextResponse.json({redirect_browser_to: cr.data.redirect_to})
}
}
Let's add an util file to store the ory references - util/ory.ts
import { Configuration, FrontendApi, IdentityApi, OAuth2Api, OidcApi } from "@ory/client";
const kratosPublicUrl = 'http://127.0.0.1:4433';
const kratosAdminUrl = 'http://127.0.0.1:4434';
const hydraPublicUrl = 'http://127.0.0.1:4444';
const hydraAdminUrl = 'http://127.0.0.1:4445'
const ory = {
basePath: kratosPublicUrl,
hydraPublicUrl,
fe: new FrontendApi(new Configuration({ basePath: kratosPublicUrl})),
oauth2: new OAuth2Api(new Configuration({ basePath: hydraAdminUrl})),
id: new IdentityApi(new Configuration({basePath: kratosAdminUrl})),
oidc: new OidcApi(new Configuration({ basePath: hydraPublicUrl}))
}
export default ory
Thats all with the implementation of the application. Before we start the application, let's setup a client in hydra to test out the oauth2 flow.
Lets execute the below curl to create a client -
curl --request POST \
--url http://localhost:4445/admin/clients \
--header 'Content-Type: application/json' \
--header 'User-Agent: Insomnia/2023.5.7' \
--data '{
"client_id": "client-22",
"client_name": "client_name",
"client_secret": "client-secret-1",
"grant_types": [
"authorization_code",
"refresh_token"
],
"redirect_uris": [
"http://localhost:3000/partner"
],
"response_types": [
"code",
"id_token"
],
"scope": "offline user_create user_read user_edit user_delete",
"token_endpoint_auth_method": "client_secret_post",
"access_token_strategy": "jwt"
}'
Please note, the client id, scope and redirect uri can be as per your choice. Once the client is created, lets update the loginOauth2 method of login-root.tsx as below (update client id, scope and redirect_uri as created above)
const loginOauth2 = () => {
window.location.assign(`${ory.hydraPublicUrl}/oauth2/auth?client_id=client-22&scope=offline+user_create+user_read+user_edit+user_delete&redirect_uri=http://localhost:3000/partner&response_type=code&state=kahsfkhas12fsf`)
}
Lets start the server now - npm run dev. Once started , lets open up http://localhost:3000 . The page should open like below
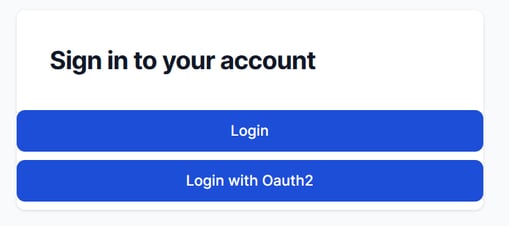
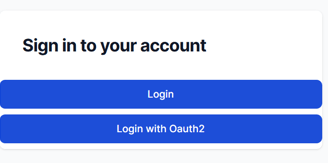
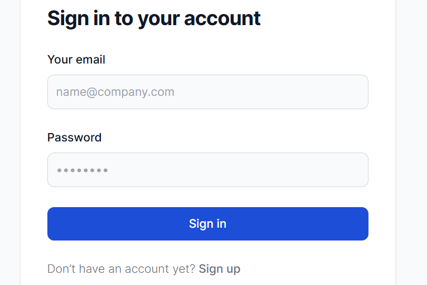
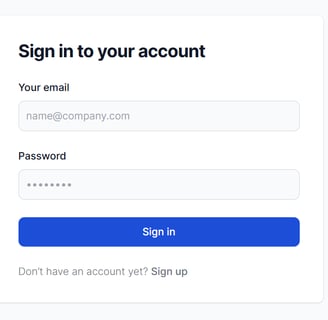
Let's click on Login for normal flow and the below page should open
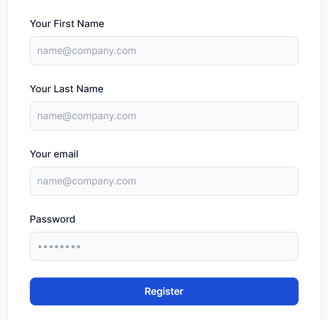
Lets click on Signup to create a new account. The below page should open
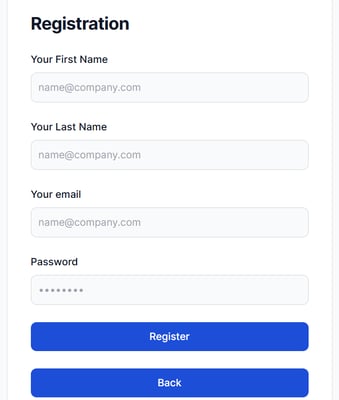
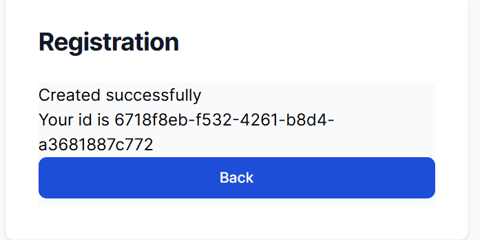
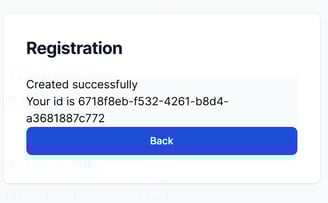
Lets provide all the details and click on Register. Once registration is scuccessful, the below page should open
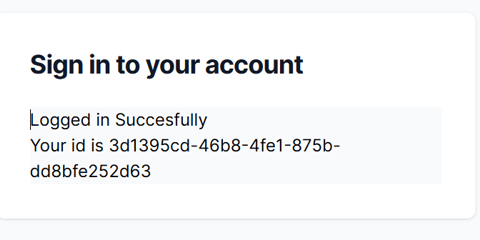
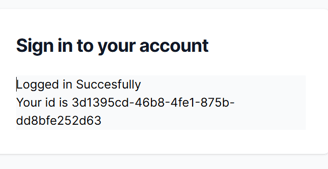
Lets go back to Sign in page again now and click on Login , and try to login with the credentials created for the account. If login successful, the below page should open
Lets go back to Sign in page again now and click on Login with Oauth2, and try to login with the credentials created for the account. If login successful for Oauth2 flow, the below consent page will open
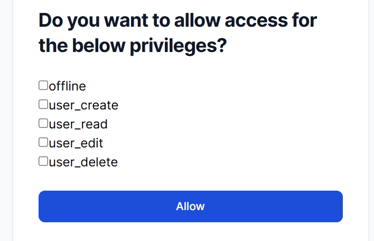
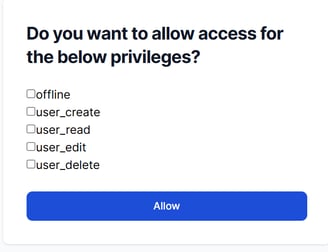
The Consent Page will show all the scopes that are available for the client we created. Here, we can provide the user the option to decide what permissions it wants to provide, all or some of them. Once 'Allow' is clicked, you might see the 404 or timeout error.
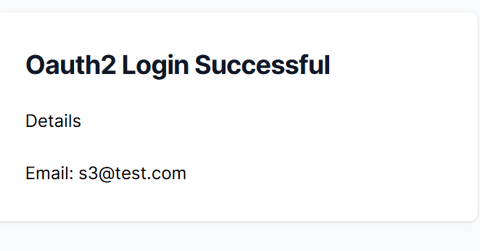
The reason being we have not configured the redirect uri pages which is http://localhost:3000/partner. Normally in practical scenarios, the client who will invoke the oauth2 url will have its own pages configured, but since we are mocking the client here, lets add the partner page. Once the oAuth2 login is successful, ory will provide us a code in the redirect url search params which can be used to generate the access token and also get the user related details as provided below
partner/page.tsx
import axios from "axios";
import ory from "../util/ory";
export default async function Partner({searchParams}: {
searchParams: {
code: string;
scope: string
}
}){
const resp = await axios.post(`${ory.hydraPublicUrl}/oauth2/token`, {
code: searchParams.code,
client_id: 'savz-client-12345',
client_secret: 'savz-client-secret',
redirect_uri: 'http://localhost:3000/partner',
grant_type: 'authorization_code',
scope: searchParams.scope
},{ headers: { 'Content-Type': 'application/x-www-form-urlencoded'}})
const { data } = await ory.oidc.getOidcUserInfo({
headers: { Authorization: "Bearer " + resp.data.access_token },
})
return (
<section className="bg-gray-50 dark:bg-gray-900">
<div className="flex flex-col items-center justify-center px-6 py-8 mx-auto md:h-screen lg:py-0">
<div className="w-full bg-white rounded-lg shadow dark:border md:mt-0 sm:max-w-md xl:p-0 dark:bg-gray-800 dark:border-gray-700">
<div className="p-6 space-y-4 md:space-y-6 sm:p-8">
<h1 className="text-xl font-bold leading-tight tracking-tight text-gray-900 md:text-2xl dark:text-white">
Oauth2 Login Successful
</h1>
<h4>Details</h4>
<div> Email: {data.email}</div>
</div>
</div>
</div>
</section>
)
}
Lets retry to login using Oauth2 and on successful login, you should get the below page